
![]() If you’re reading this, note – this is part two of the construction of phase 1, building a functioning hydroponic system. If this is your first time here and you’d like to follow along step-by-step, I suggest you go back and read the introduction, the materials list, and entry #1. Since my seeds were still germinating in my fancy box, I had some time before the seedlings needed to be transplanted into their new, yet-to-be-constructed homes – 6 7″ x 7″ pots about 10″ high, sitting in 4″ of water that is constantly being circulated between two reservoirs. Given my lack of experience with building a plumbing system, this is where I leaned heavily on Japan Aquaponics’ Indoor System. I divided this plumbing project in four parts- the grow bed, the bell siphon, the drip manifold, and the pump.
If you’re reading this, note – this is part two of the construction of phase 1, building a functioning hydroponic system. If this is your first time here and you’d like to follow along step-by-step, I suggest you go back and read the introduction, the materials list, and entry #1. Since my seeds were still germinating in my fancy box, I had some time before the seedlings needed to be transplanted into their new, yet-to-be-constructed homes – 6 7″ x 7″ pots about 10″ high, sitting in 4″ of water that is constantly being circulated between two reservoirs. Given my lack of experience with building a plumbing system, this is where I leaned heavily on Japan Aquaponics’ Indoor System. I divided this plumbing project in four parts- the grow bed, the bell siphon, the drip manifold, and the pump.
Before I could get started on the plumbing, I had to first modify  one of the storage bins to be my grow bed. There were some moments during the construction of phase 1 where I thought, “Wow that is just too perfect.” Working with the bins was one of them: the way the pots fit inside the Iris 44 qt. storage bin, the location of holes being right where there were two circles already marked on the bottom of the bins, their dimensions, the way they fit inside the laundry hamper. I cannot emphasize this point enough – these bins are just right. However, there were two important modifications that needed to be made – drilling two 3/4″ holes on the bottom of the bin and cutting off the lip of the bin.
  To drill the holes, I took the cheapest drill I could get my hands on; threw in a 3/4″ saw cutter drill bit; and went to town, drilling two holes right where as I said before there were two circles already marked on the bin. To cut off the lip, I took a nail and hammered four holes in the bin below the lip; widened the holes with a pair of scissors; inserted the keyhole saw into that slit; sawed the along the walls; and then finished by cutting off the corners. Then to clean up the edge and give something the pots could grip onto, I put a bit of duct tape along the unclean edge.

Next, part 2 – the siphon. The Internet is rich with content that can teach you everything you’d like to know about siphons for hydroponic systems – the different kinds, how they work, how to build them, and so on. I landed on the bell siphon for two reason – it was simple and compact. One resource that was particularly helpful was Grow Dinner Aquaponics‘ video, “Trouble FREE Bell Siphon – Automatic Siphon Aquaponics Flood and Drain Beds.”

This guy is great. He walks you through everything you need to know his siphon. The big difference between his and mine though is the media filter. I don’t have one since the pots do a good job of holding my hydroton. The other difference is the size. Mine is only 4 inches tall. To build mine, I mostly followed his instructions, except since the drill bit I had was for a 3/4″ hole, I worked with that to add my snorkel to the PVC cap. I also used that same drill bit to make three holes in the 2″ PVC pipe, which were used to hold the aquarium filter sponge (see black extensions coming off siphon image below) as well as make cutting the pipe with a keyhole saw a little easier. Below the bell siphon and on the bottom side of the bin, there is a 90 degree corner reducing female adapter, helping reduce the flow of drainage. On that, I added the 90 degree male to barbed 1/2″ hose fitting, and then to finish the drain, by attaching some of the 1/2″ tubing to the barbed fitting, directing the flow of water.

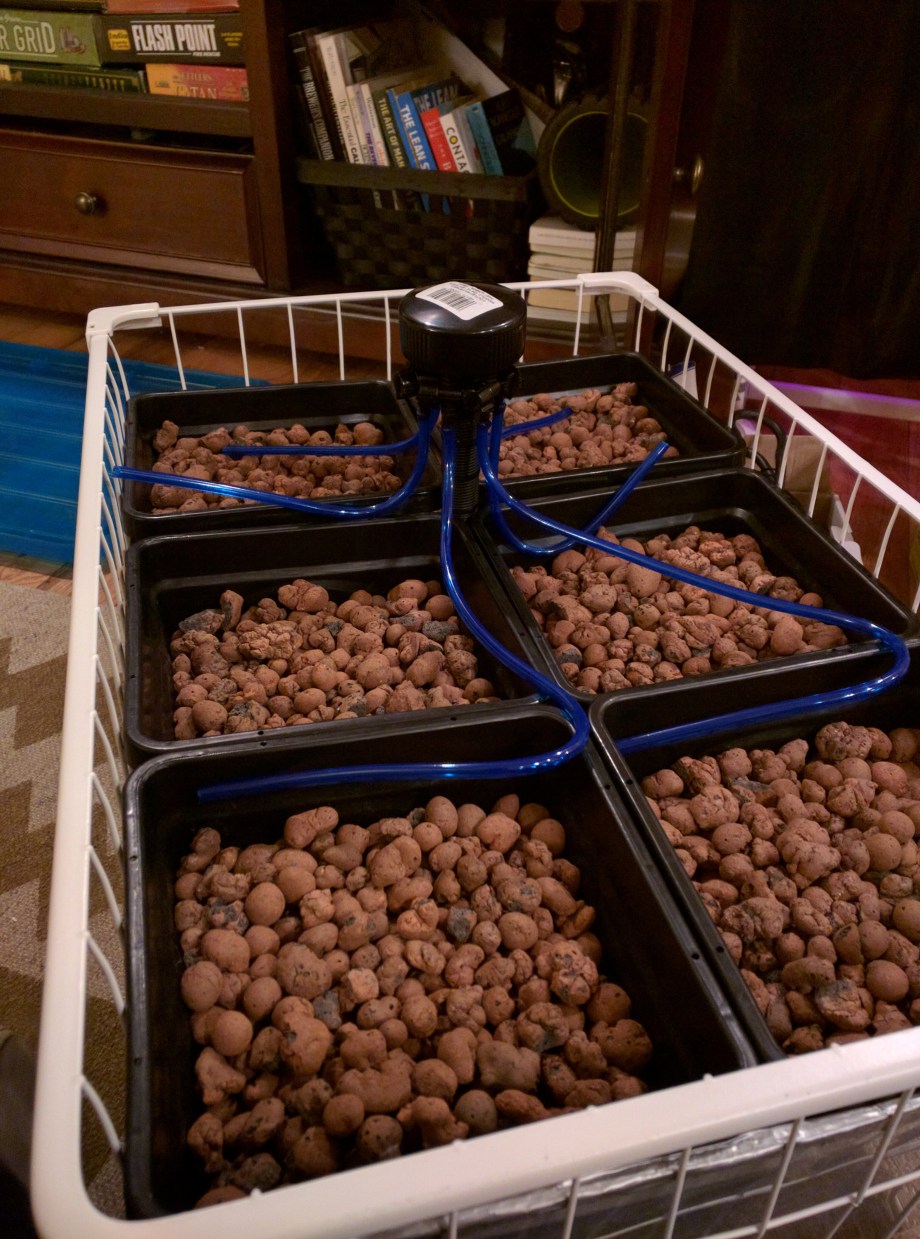
You’ll notice in the image above that I’ve installed  the segmented 3/4″ PVC pipe already trimmed to the exact height I needed, so it would still fit in the basket, but so the drip manifold sits above the pots. To build that, I repeated the steps from above to drill another hole into the bin, which was also marked with a circle on the bottom of the bin already. Using a 3/4″ female adapter underneath, I stabilized the segmented pipe. To get the bin to sit inside the cage bin of the laundry hamper, I had to cut two holes using a pair of wire cutters for the two pipes in the cage (pictured right).
 Atop the segmented pipe, I placed the drip manifold. Running from that manifold are 6 lines of O2’s blue tubing measured and cut to the exact length required to reach the center of each pot from the manifold. At the end of each of these 6 lines, a drip baskets that extends deep into the roots of the plants delivering water through their adolescence. However, my hope is that the plants’ roots will eventually grow deep enough that they tap into the water table 6 inches below. By shutting of the drips at night, I hope that the roots will instinctively grow towards the secondary water source deeper below the surface like leaves stretching towards the light above.
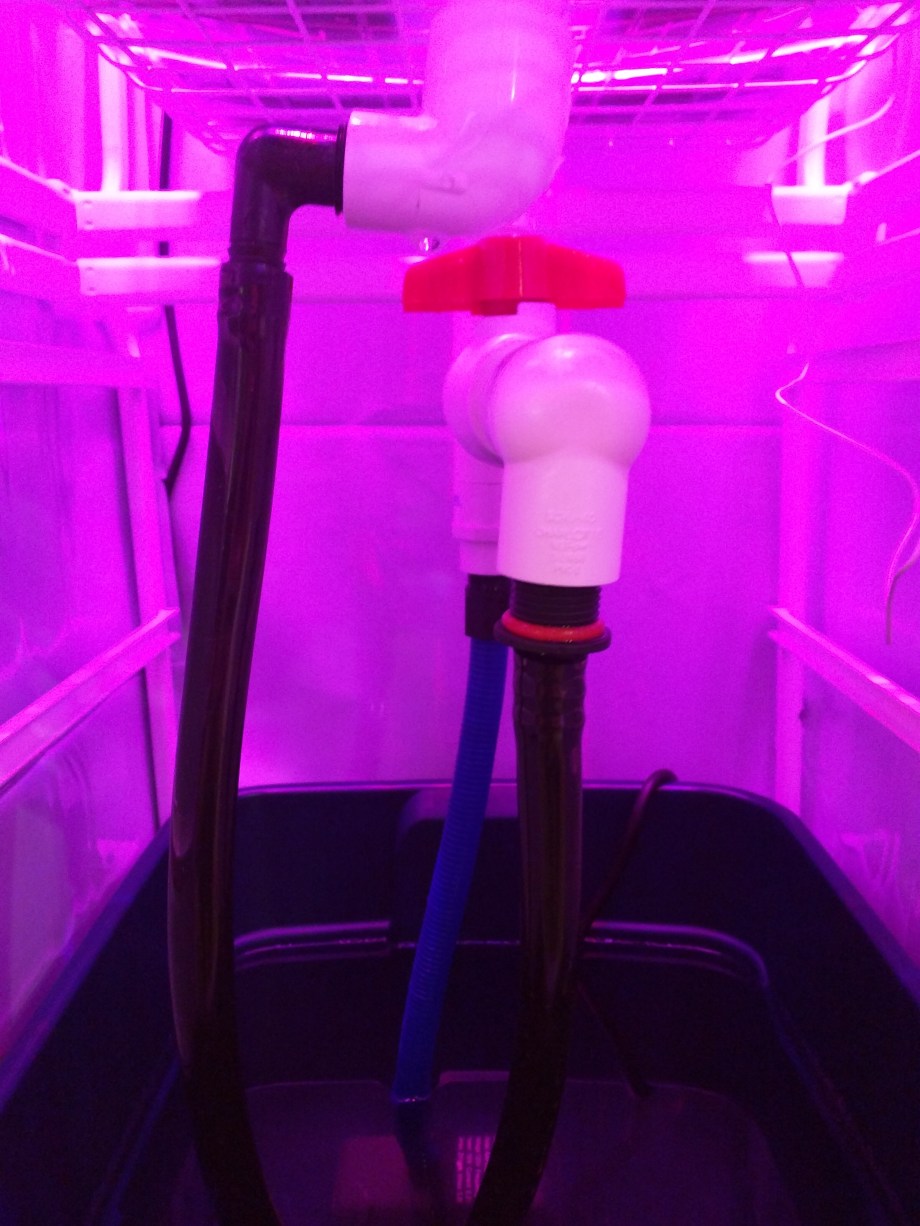
And lastly, for part 4 of the plumbing project, I worked on everything going on beneath the drip manifold pipe that connects it to the pump. I took this one right out of the Japan Aquaponics playbook. Their instructions are pretty clear and the photo below gives you the gist of it.

Once everything was assembled, I tested for leaks by running water through all the various parts of the system separately then together. To seal them up, I used a little aquarium friendly silicone sealant from Marineland, doing so sparingly and never on any of the more expensive parts. BOOM… Plumbing project accomplished.
postscript – the seedlings were not transplanted into their new home until after they developed beyond the seedling phase… this took longer for some of the plants than others… for the cilantro, it took weeks… while the plants were still in the tray, I continued to monitor the water level and its pH/ppm, adding a single drop or two of Dyna-Gro and/or pH UP/DOWN every few days depending on their needs…

